Reporting & Analysis
28.04.2022
TLDR
To separate your Shopify sales by state for tax purposes, you have a few options. First, if you have a Shopify plan or higher (US$79 per month), you can create sales reports directly on Shopify. Alternatively, you can manually export data from Shopify and filter it by state in Google Sheets or Excel. Another option is to use Airboxr, which offers a 'Customers by Location' Hop to automatically pull data on customers by location into Google Sheets. This can save you time and effort in preparing your sales tax by state.
If you’re running a Shopify store and have to prepare financial documents for quarterly taxes, you’ll need to know how to separate your Shopify sales by state. You need a Shopify plan or higher (US$79 per month) to be able to create sales reports on Shopify; but if you don’t, you can still get the data you need through a more manual process. You can also use Airboxr to automatically pull data on customers by location directly into your Google Sheet, using Hops.
Today, we’ll show you a few ways you can separate Shopify sales by location, so that you can prepare your sales tax by state:
Export Shopify data into a CSV file and clean it in Google Sheets or Excel
Option A: Export your Shopify orders.
This is how you can manually obtain the data on Shopify orders by state:
Go to the Shopify Orders screen (Admin > Orders).
Set the date range you want.
Export the orders to a CSV file.
Use Google Sheets or Excel to filter and sort the orders in the CSV file by state. Use column AP (Shipping Province).
Option B: Export your Shopify sales report.
As another option, you can download your Shopify sales report instead.
Go to the Shopify Sales report (Admin > Analytics > Reports > Finances > Total Sales).
Set the date range you want.
Export the sales report to CSV; within the Export window, click “Full Report” to get all the metrics.
Use Google Sheets or Excel to filter and sort the sales in the CSV file by state. Use column M (Shipping Region).
If you often need to get Shopify sales data by state, as well as several other types of data analysis on a regular or daily basis, it may make sense for you to invest in an app. Airboxr allows you to get quick insights into your Shopify store, saving you hours normally spent downloading CSV files and repeatedly cleaning data.
Improve your DTC game. Sign up for weekly tips.
Use Airboxr’s ‘Customers By Location’ Hop to get a Shopify Sales by state report
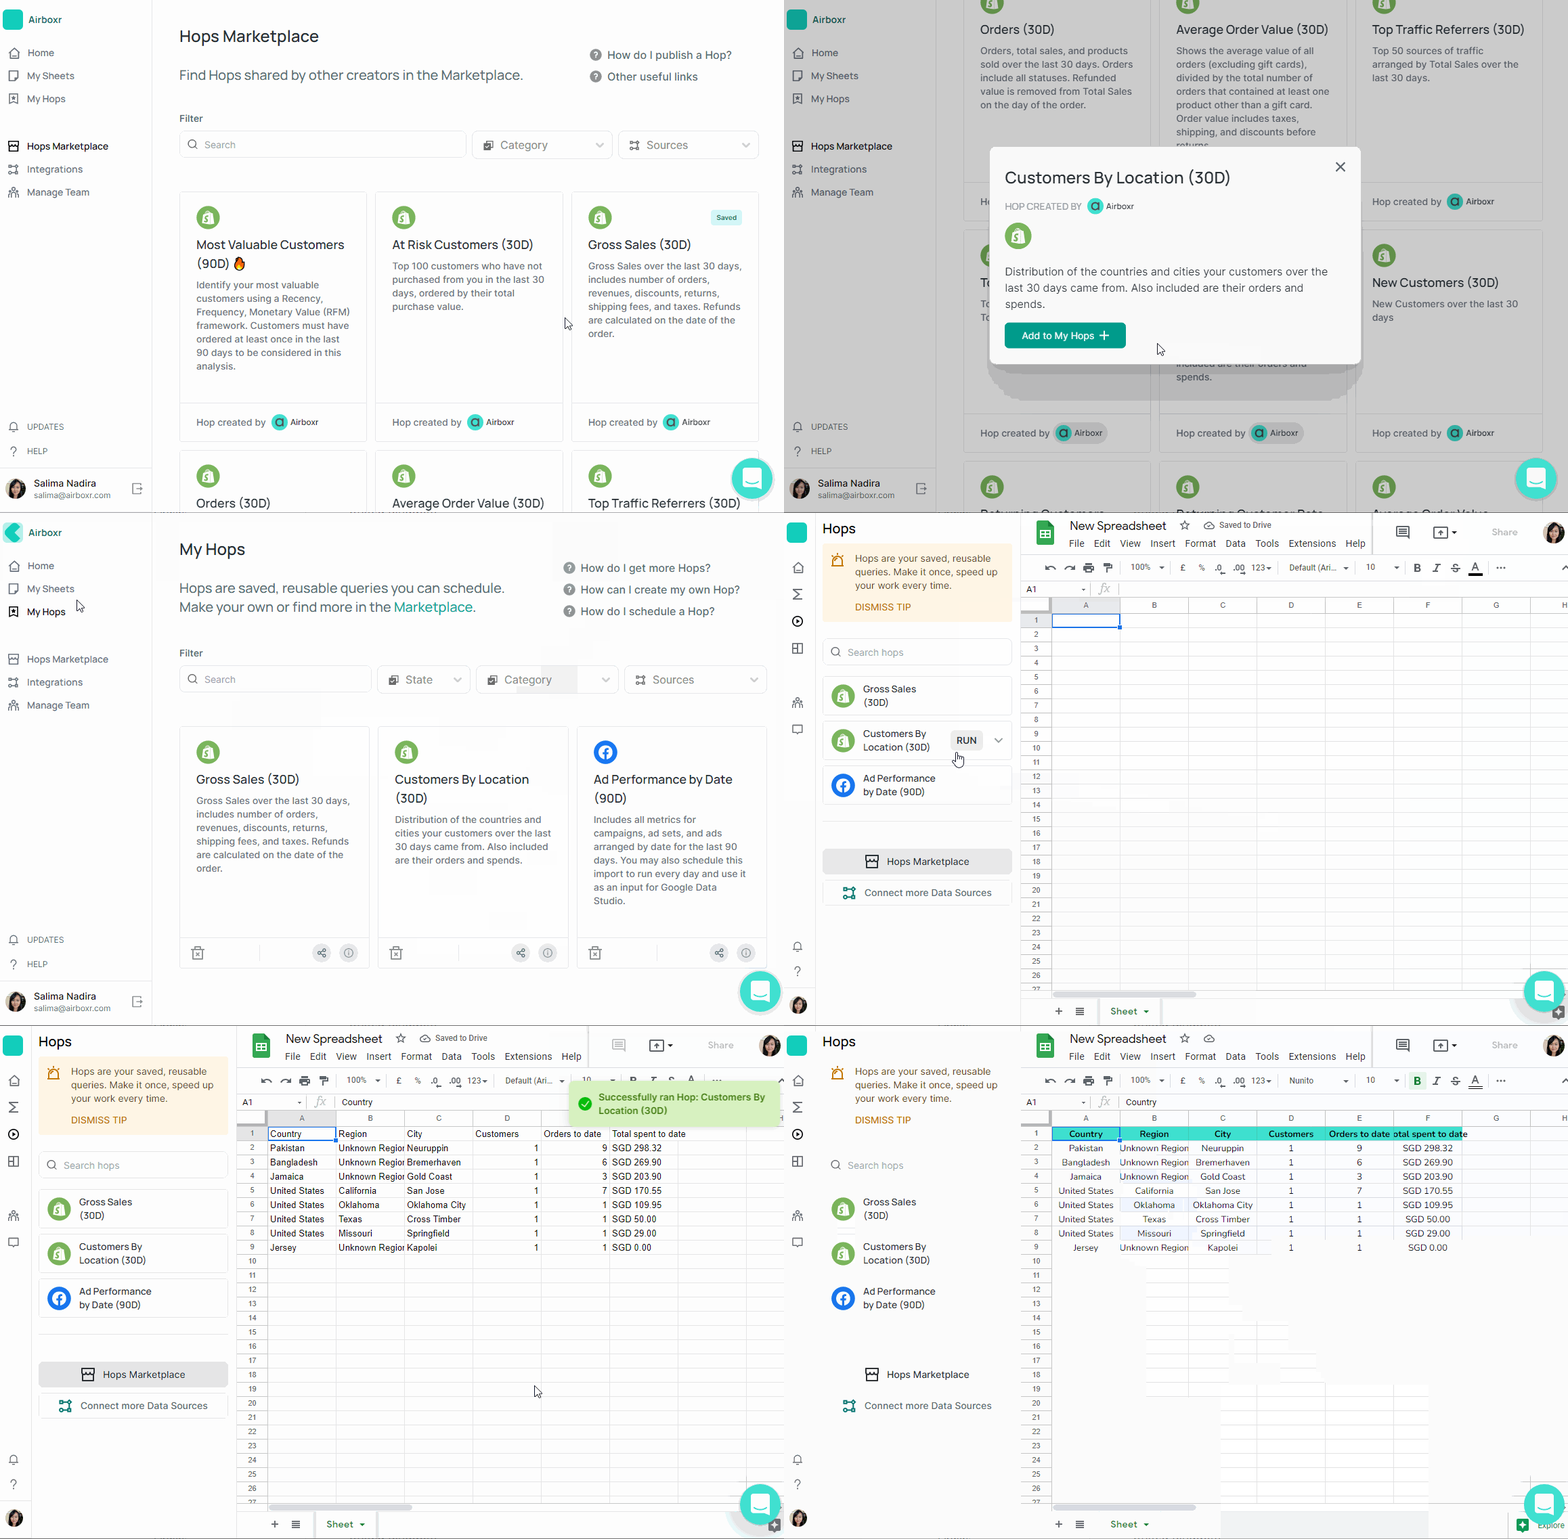
See how you can find Shopify sales by state automatically using an Airboxr Hop:
Go to Airboxr’s Hop Marketplace.
Add Customers by Location to your Hops.
Open a new sheet and run the Hop. Your data is ready!
Watch the Hop in action below.


